Enhance professionalism and organization by easily adding custom exhibit stickers, complete with your case information, which increment automatically, ensuring seamless tracking of exhibits.
Exhibit stickers are a powerful feature in TrialPad! Creating and assigning exhibit stickers is fast and easy, whether you assign them in bulk, or one at a time.
Setting up your Exhibit Sticker
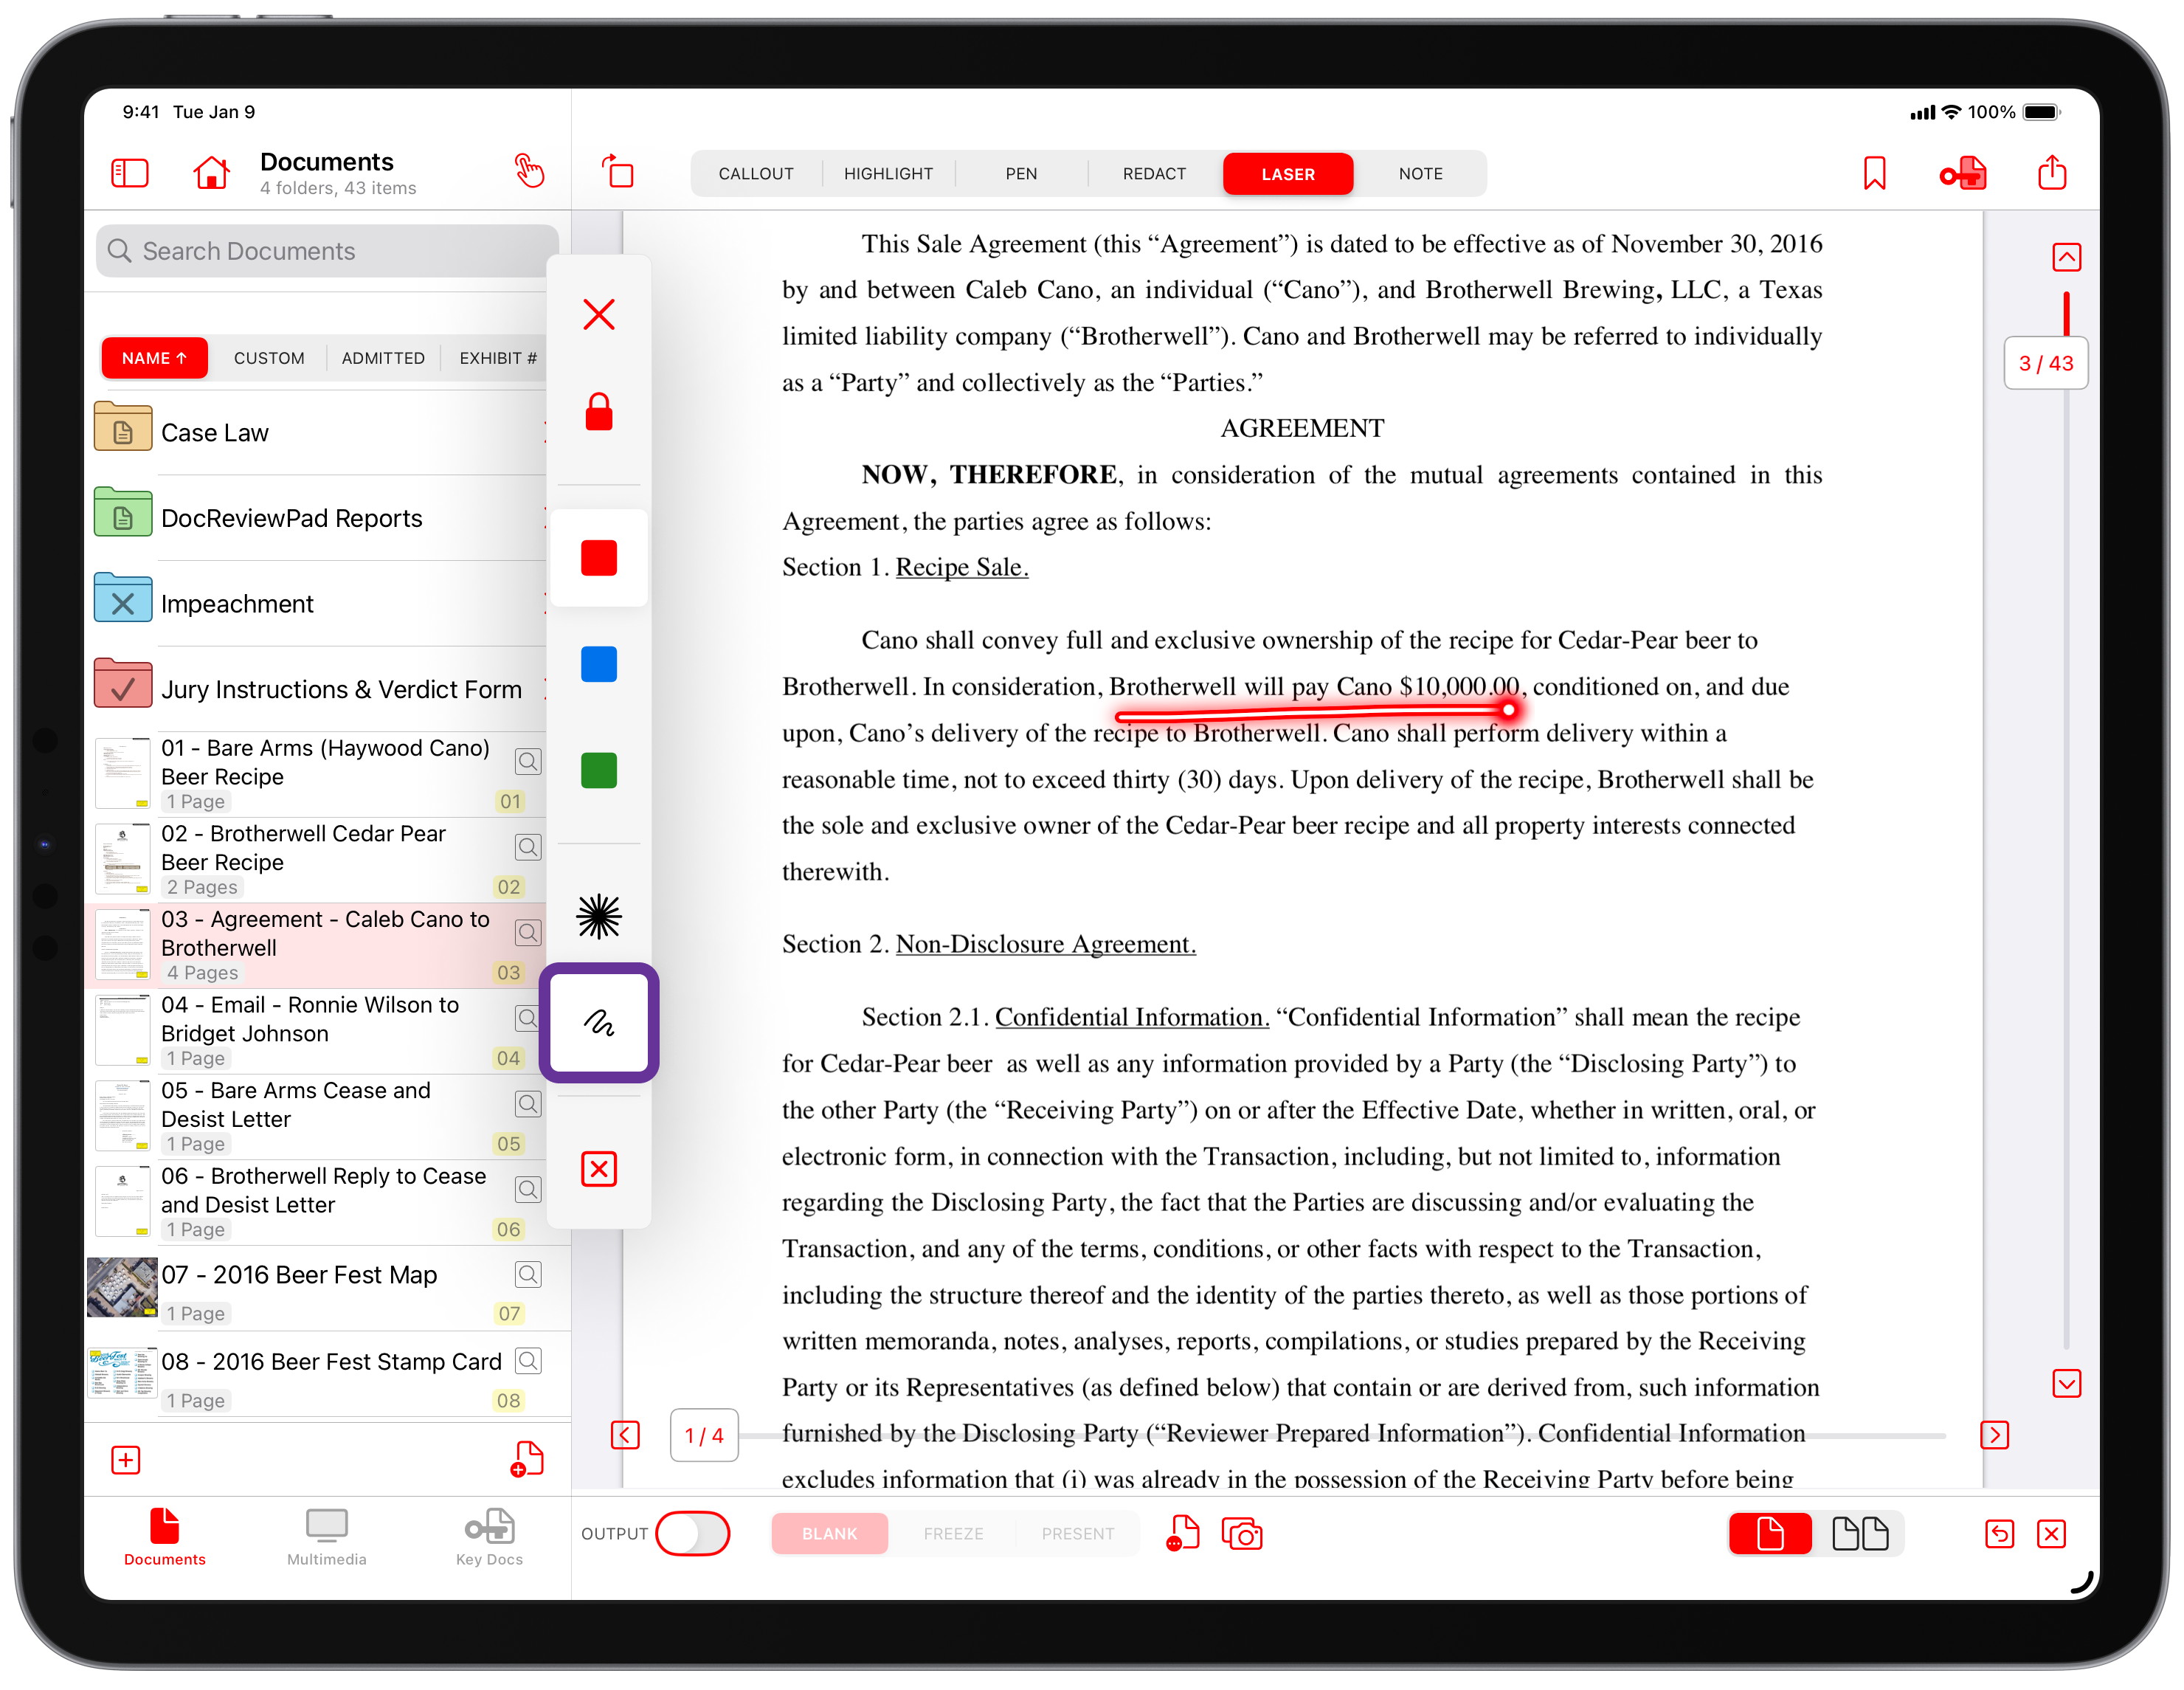
Start by setting up the Exhibit Sticker. This only has to be done once, as TrialPad will remember all your settings and automagically apply them to subsequent stickers. To set up the exhibit sticker, first select a document. On the first page of the document, long press if you are on an iPad, or right-click if you are on a Mac. Choose Assign Exhibit Sticker.

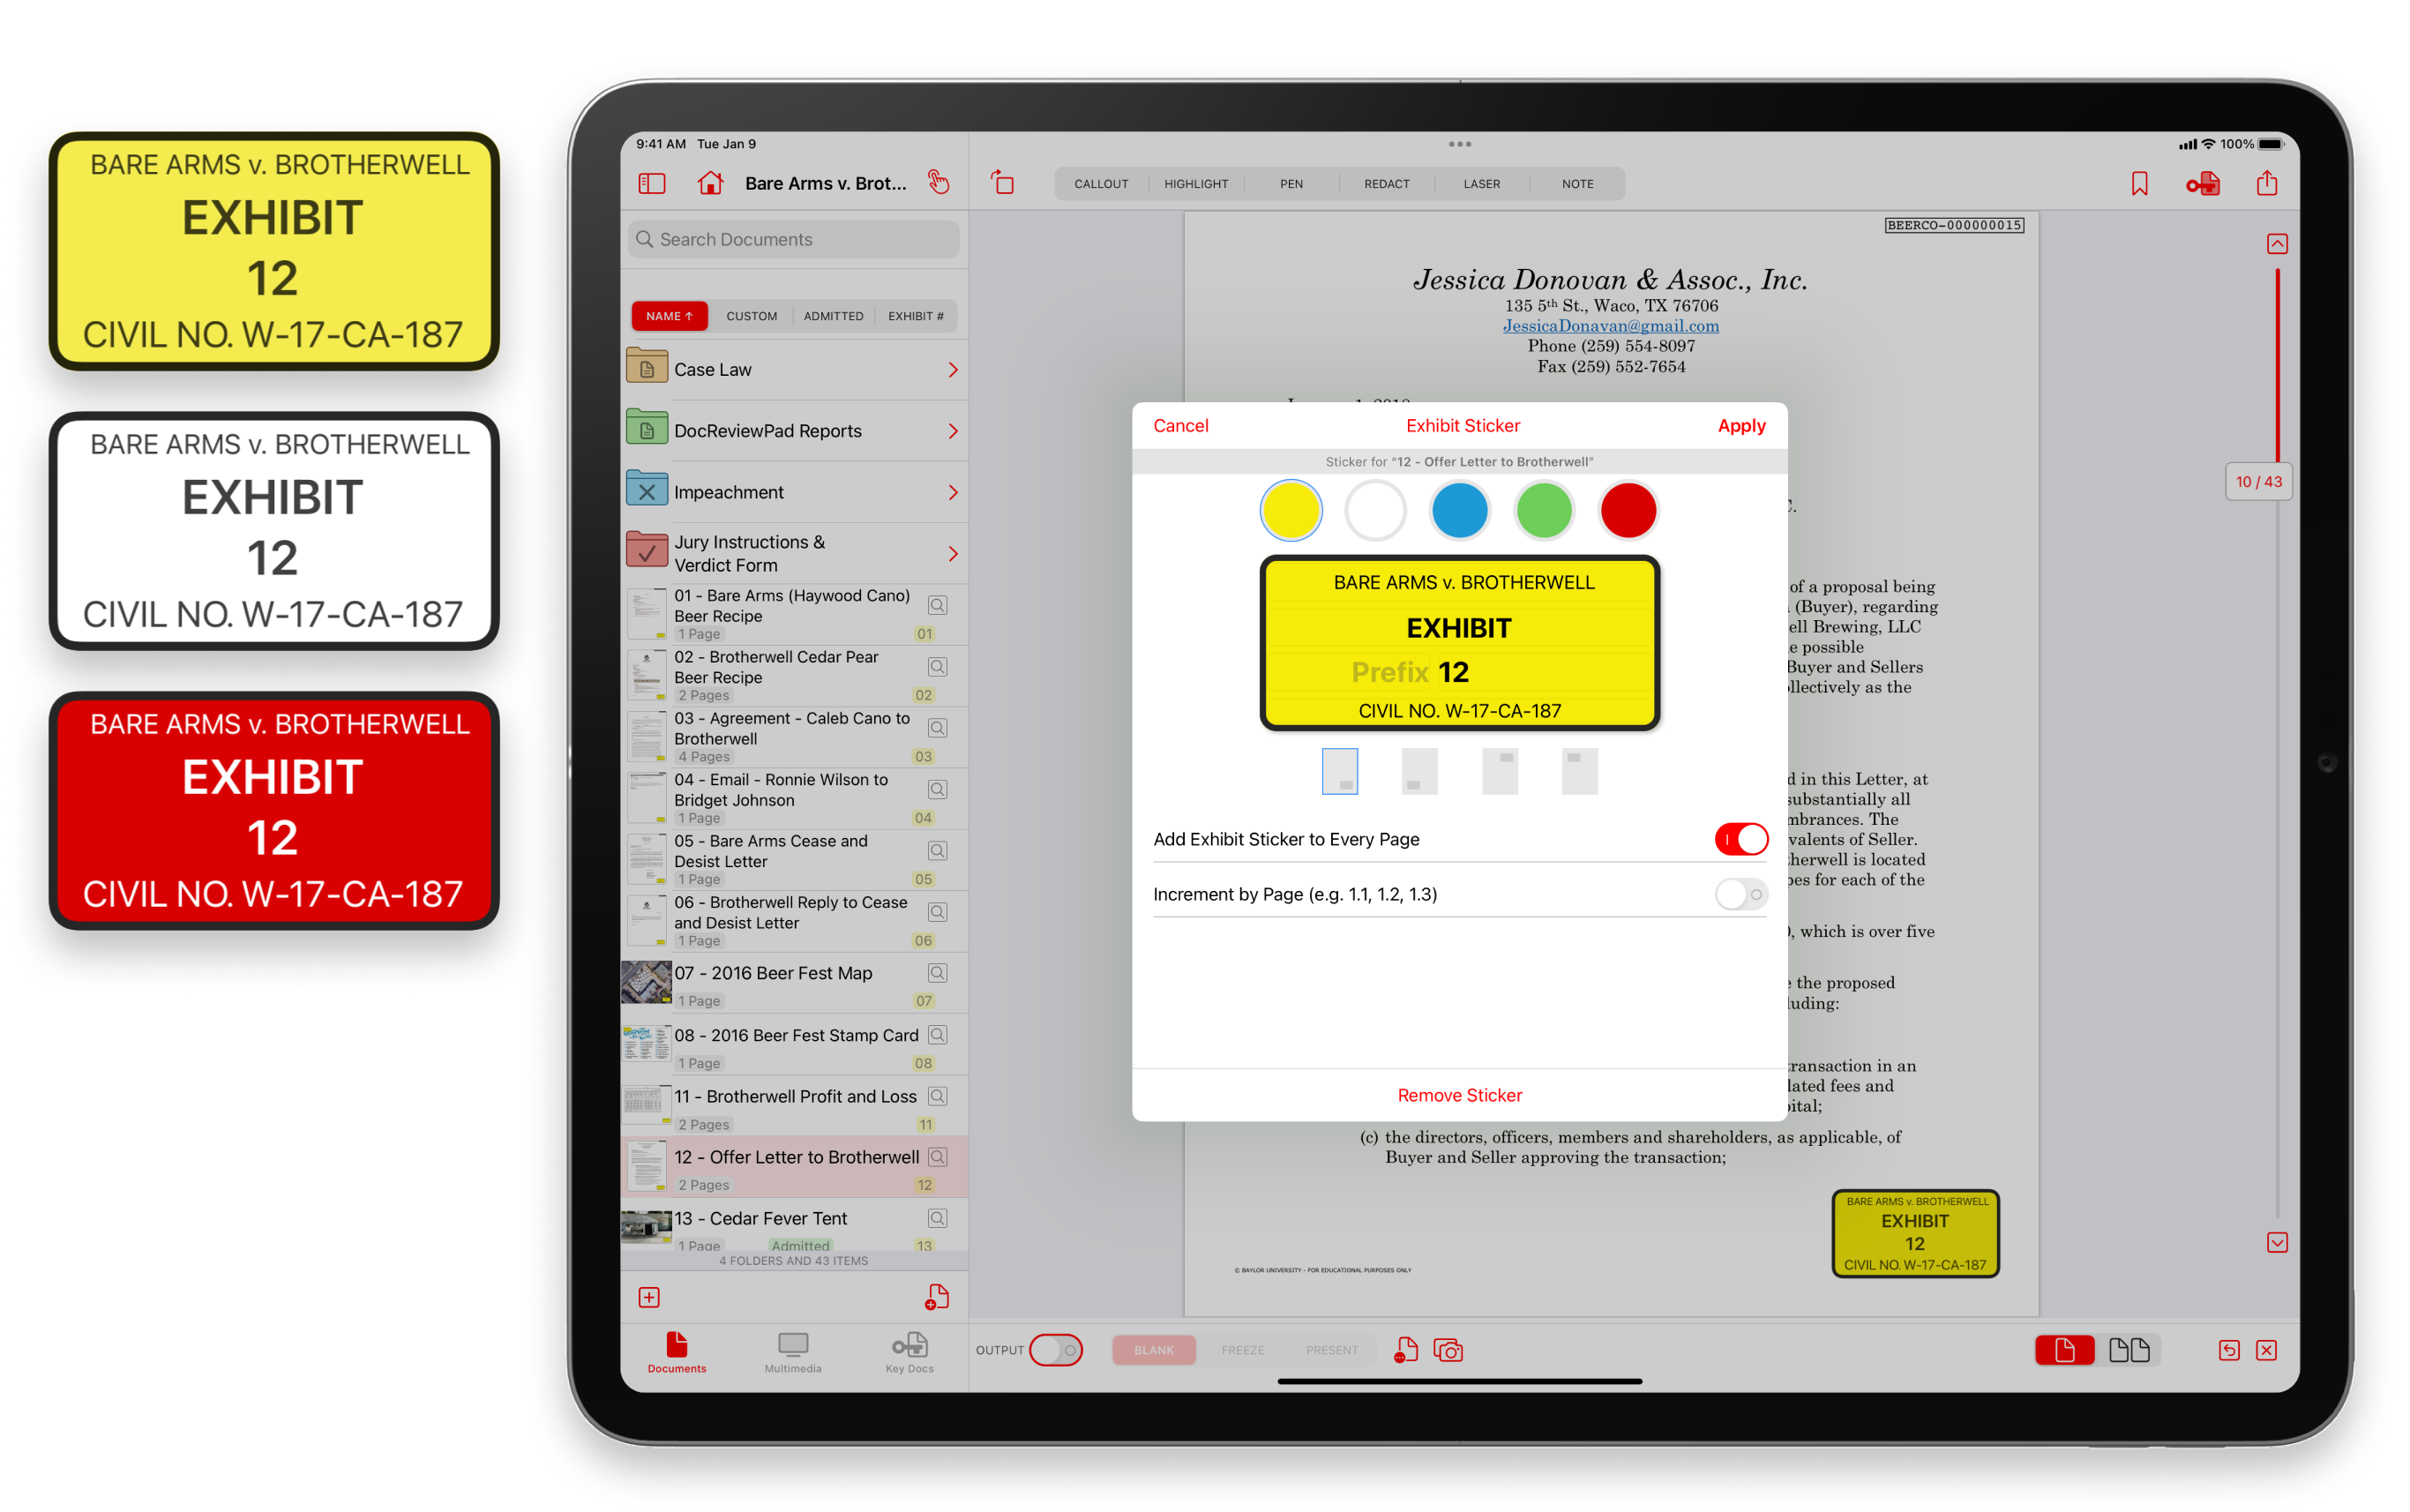
You will see options for the default color and location, as well as options to add an exhibit sticker to every page, and increment by page. Type in the information you’d like to appear as your Header, this is fully customizable, but most often used for the case name. Next, you can leave the default title “EXHIBIT”, or change it to something different, like “Deposition Exhibit” or simply “EX”. The next field is the Prefix, which most people use to identify the party the exhibit belongs to, using a simple “P” or “D”, or even “Petitioner” or “Respondent”.
In the next field, choose your starting number or letter. TrialPad will automatically increment your stickers as you assign them. Finally, add the footer information, commonly the Case Number. Select Apply in the top right corner of the popover to apply the sticker to your document!
Assigning Exhibit Stickers
Once you’ve set up your first exhibit sticker, assigning subsequent stickers can be done very quickly. You can assign subsequent stickers one at a time, or in bulk.
If you are taking a deposition and wish to assign exhibit stickers as you bring up each document, simply select the document. Like before, on the first page of the document, long press if you are on an iPad, or right-click if you are on a Mac. Choose Assign Exhibit Sticker, and you’ll see all the information you added to your first sticker, and the automatically incremented number or letter. You can change any fields if needed, or simply tap Apply to assign the sticker.
To assign exhibit stickers to multiple documents, select the documents using the Select button at the top of the Documents List. Then choose Edit at the bottom left of the Documents List. From the list of actions, choose Assign Exhibit Sticker, preview your sticker, and tap Apply.
Exporting Exhibit Stickers
Once your Exhibit Stickers have been assigned, you can easily export them from TrialPad. Again, this can be done one at a time, or in bulk.
To send one document at a time, select the document, and tap/click the activity button, also called the share sheet in the upper right-hand corner. Next, select the method you want to use to share the document, including email, AirDrop, or even printing. Your document will be sent with the exhibit sticker you created applied to the first page. It is that easy!
To send multiple documents with exhibit stickers, first select the documents using the Select button at the top of the Documents List. It may help to filter the Documents List by Exhibit Number using the tabs at the top of the list. Choose Edit at the bottom left of the documents list. From the list of actions, you can choose Print, Export, or Export by Exhibit #. You can export directly to a USB, or you can save your exported files to a location on your iPad and later upload to a cloud storage provider, or AirDrop the files to a colleague or a different device.
Three Benefits of Exhibit Stickers in TrialPad
Assigning your Exhibit Stickers using TrialPad confers additional benefits within the app!
1) When you are presenting a document in TrialPad, you can choose to show the exhibit number and page number at the top of the presentation screen. TrialPad uses the information in the exhibit sticker to ensure that your jury always knows what exhibit they are viewing, no matter what page you may be showing.
2) Applying Exhibit Stickers in TrialPad places a small exhibit label under the document name so that you can easily locate and identify exhibits in the Documents, Multimedia, and Key Docs tabs.
3) TrialPad Reports use the exhibit sticker information to show what exhibit was presented in the Presentation Log Report. In the Presenter Notes Report, TrialPad includes the exhibit number referenced by the note, and even better, the Evidence List Report can be filtered by Exhibits, making TrialPad reporting even more powerful!

Learn More:
Paul Keisel, Esq. handles complex Personal Injury, Wrongful Death, Class Action and MDL Actions and says, "I assign numbers to each exhibit and use the same exhibit number throughout all of the pre-trial proceedings. This way, for example, Exhibit 1, is the same exhibit from deposition to deposition and there is no need to re-number the exhibit later in the case." Learn more about how Paul uses TrialPad: https://www.litsoftware.com/blog/featured_pro_paul_kiesel
See how exhibit stickers proved their worth when TrialPad was used to organize, manage, and present a voluminous amount of documentary evidence. The case had over 6,700 separate exhibits, and many were large multi-page documents, including several containing thousands of pages. https://www.litsoftware.com/blog/trialpad_proves_its_worth
Are you using letters instead of numbers? Check out this helpful post on labeling exhibits using letters, and avoiding "Exhibit AAAAAA": https://www.litsoftware.com/blog/featured_tip_labeling_exhibits_using_letters